How to Install a Minecraft: Java Edition Map
Part 1: Opening the Correct Minecraft Version
Step 1) Download the map. Remember the listed game version!

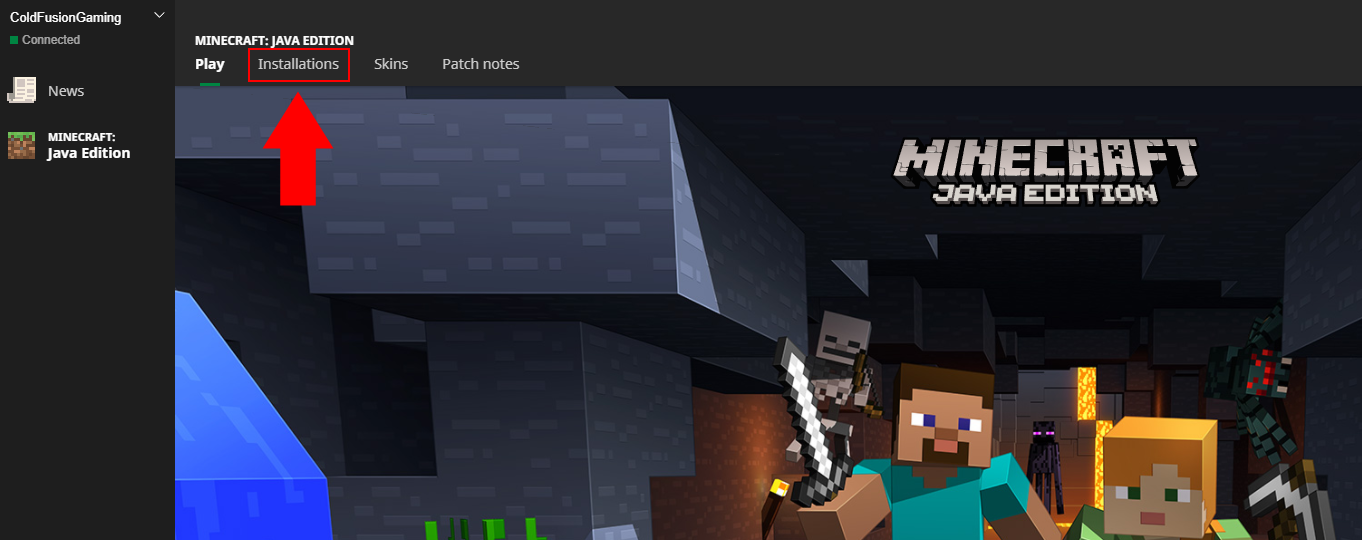
Step 2) Open the Minecraft launcher and click "Installations"
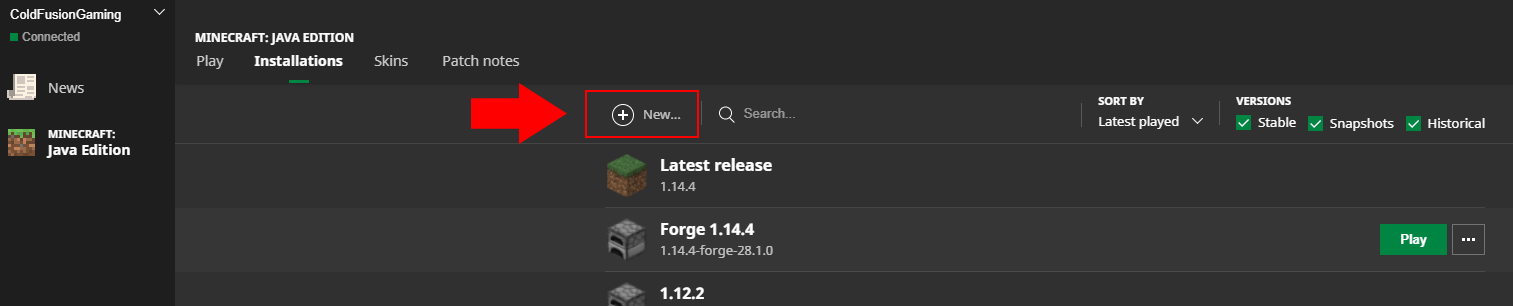
Step 3) Click "New" to create a new Minecraft installation
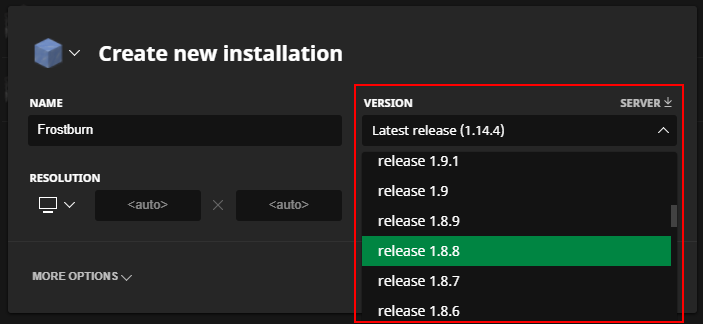
Step 4) Give the configuration a name
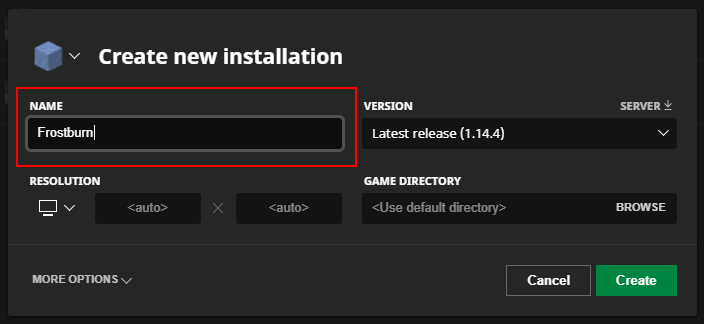
Step 5) Select the correct version from the dropdown menu
Playing a map in the wrong Minecraft version could break it!
Step 6) Click "Create"

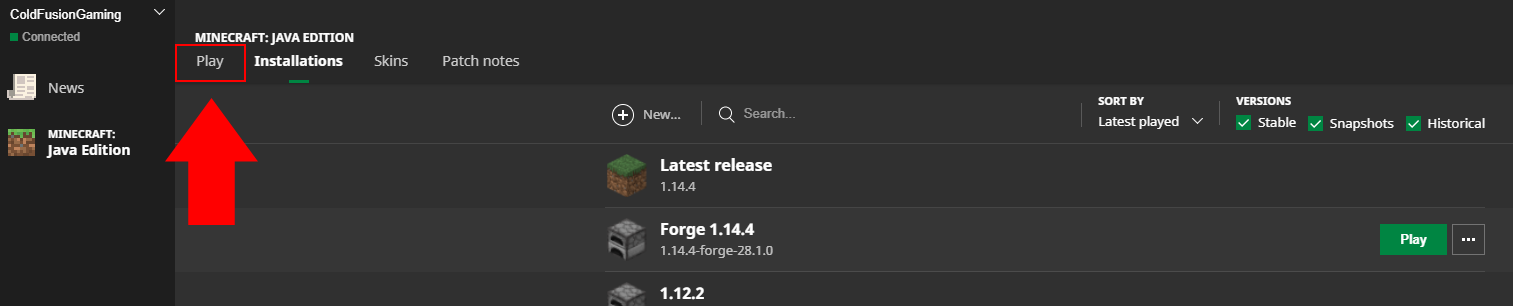
Step 7) Click "Play" to return to the launch screen
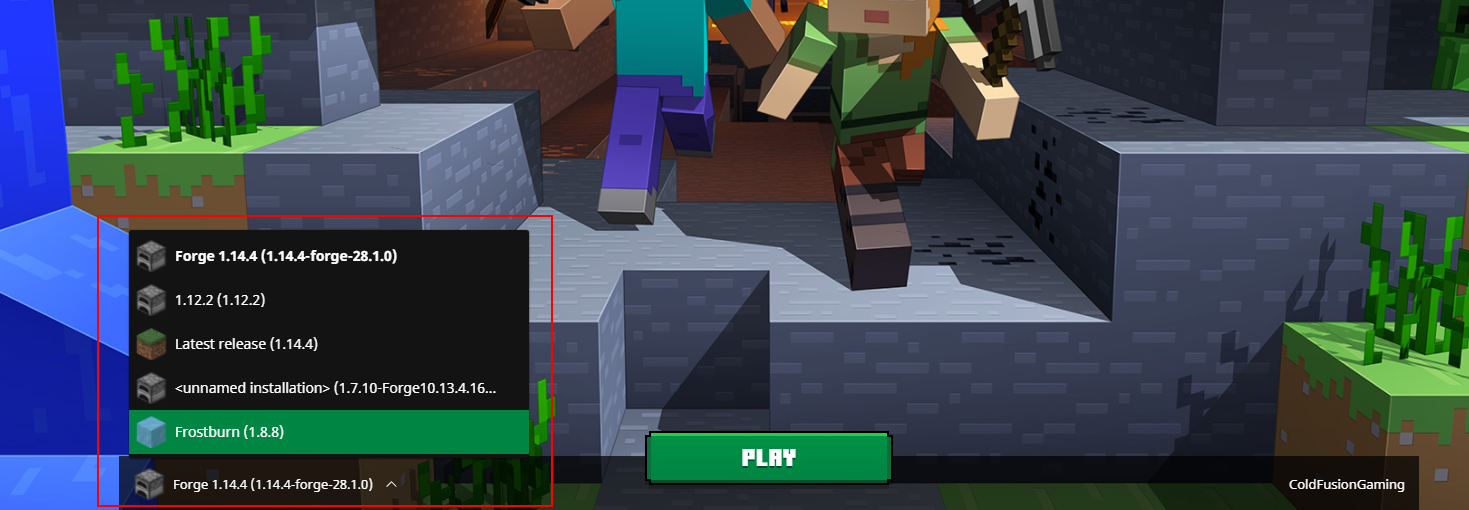
Step 8) Use the drop-down menu to the left of the green "Play" button to select the installation you just made
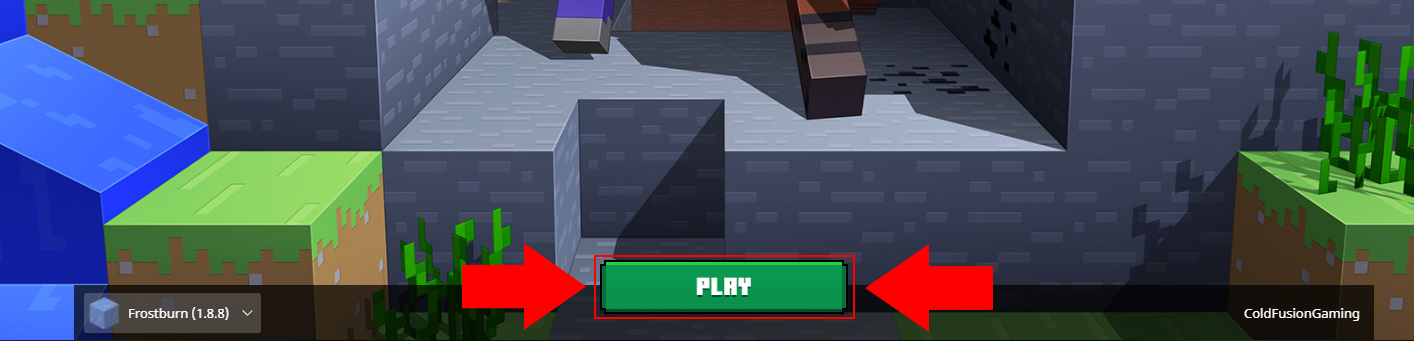
Step 9) You're all set! Click "Play"!
Part 2: Installing the World
Step 1) Locate and extract the downloaded map zip file
By default, it will be in your "Downloads" folder
On newer versions of Windows, right-click on the zip file and click "Extract All"
On older versions of Windows, you may need to install 7-Zip or WinRAR
On Mac, double-click the zip file to extract it
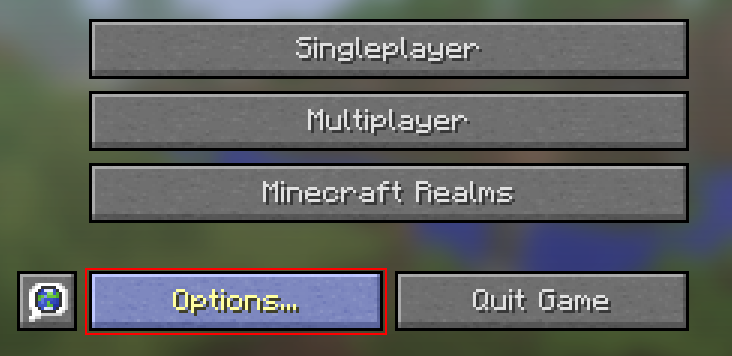
Step 2) Back in Minecraft, click "Options"
Step 3) Click "Resource Packs"
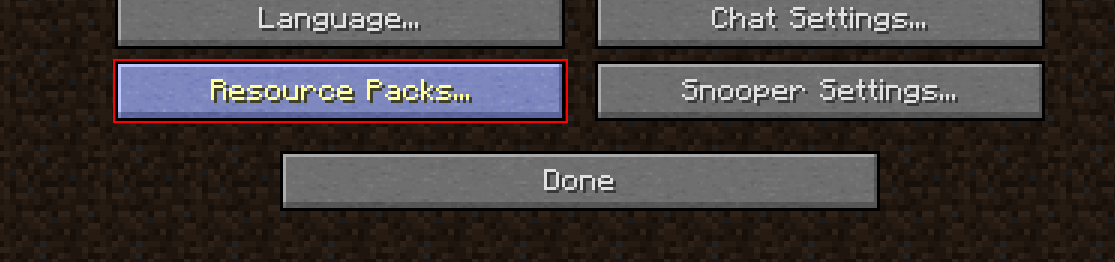
Step 4) Click "Open Resource Pack Folder"

Step 5) Minecraft will open your resourcepacks folder. From here, go up one level so that you are in the .minecraft folder
On Windows, you can click the little up arrow or click on ".minecraft"
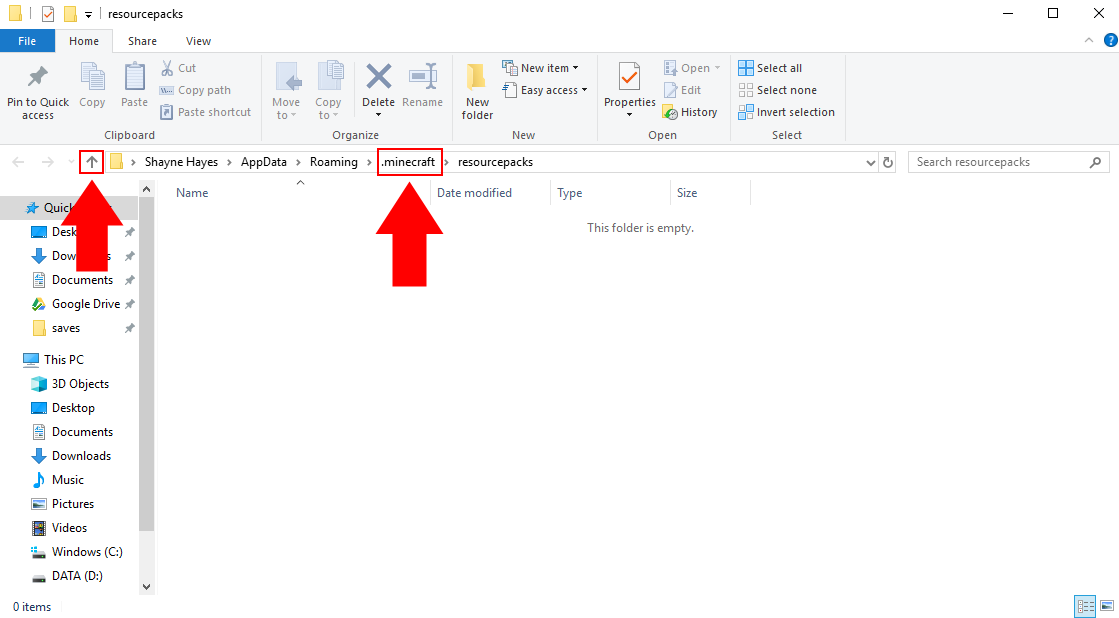
Step 6) You should now see a folder called "saves". Make a copy of your saves folder to backup all of your worlds
Step 7) Drag the map's world folder into your saves folder

Part 3: Installing the Resource Pack
These steps are only required for maps with resource packs!
Step 1) Drag the map's resource pack into your resourcepacks folder
If playing in Multiplayer, other players will also need to do this

Step 2) Back in Minecraft, refresh the Resource Packs list by clicking "Done" and then clicking "Resource Packs" again
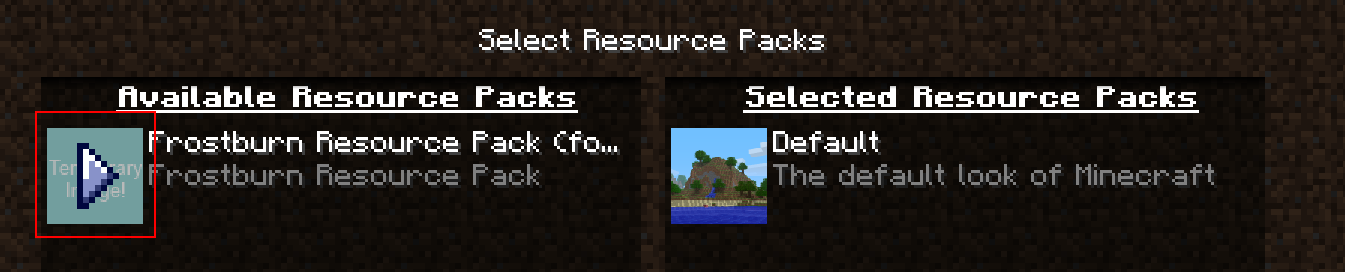
Step 3) You should now see the map's resource pack under "Available Resource Packs". Enable it by hovering over it and clicking the right arrow